
Photo Booth Fun Using Apps!
by Mike Sheley
If you have been around any junior highers with cell phones or devices like iPod touches or tablets, you are familiar with their love of the selfie, a picture taken of themselves they usually take to share with others.
Without realizing it, today’s young teens are enjoying something their grandparents and parents enjoyed, just in a much more portable way.
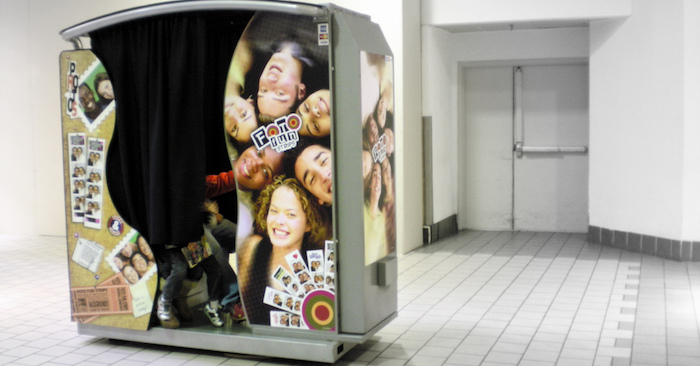
Before cell phones came with cameras, the fun way to take a selfie was in a photo booth, often found in your local shopping mall.
You would sit inside for several pictures and then, for a small fee, get a strip of those pictures printed out shortly afterwards.
What if we could take this old idea with new technology and add a bit of fun to your next big event or make this a regular part of your weekly gathering?
And what if we could give you a few options so that this idea could fit any budget?
That’s exactly what we have for you this week.
JUNIOR HIGH MINISTRY EVENT IDEA – PHOTO BOOTH
DOWNLOAD THE PDF VERSION OF THIS EVENT
I’m going to describe for you how we set up this photo booth for some recent events with our junior highers.
Then, I’ll give you some options you can choose from based on budget and available equipment.
Full disclosure: I received no promotion or payment from the folks behind Pocketbooth Party. It’s just the only app I found that does all of this really well without a complicated setup or workaround.
Supplies:
- iPad
If your ministry doesn’t have one, it is best to use one that belongs to the church and is being used by a staff member to keep photos from being stored or removed from someone’s personal device.
- Photo Booth App
Pocketbooth Party the simple DIY Photo Booth for your next event (Selfie Photobooth) By Project Box ($40)
- Printer
Epson XP620 : print wirelessly from your device; prints photos well; has separate ink cartridges so you only replace the color you are out of instead of all of the cartridges.
- Photo Paper
Search Amazon for deals. Pocketbooth Party prints 4×6 prints. You can usually find photo paper for this size for about $10 for 100 sheets.
- Props
(We didn’t use any props…yet. But see my note at the bottom of this post for what you might use or where you might get some.)
- Video Adapter & TV
We set our photo booth up next to a tv with an HDMI input. We then used this adapter from Apple to mirror what was on the iPad on the tv screen. As students saw how much fun people were having taking pictures, they were drawn over and it promoted itself.
Prep:
Always test your equipment out to make sure it works where you will use it. This is important if you plan to print wirelessly but don’t know if you’ll have wifi!
Set up your photo booth area. It works best to have a leader stationed here the whole time, but you can also print out a sign with directions. Make sure the area is well lit. Take some test photos to be sure.
Make sure the app you want to use is purchased and installed. Adjust any settings you want before you begin. With Pocketbooth Party, you can setup thins like text for the photo booth screen and text on the picture like the name of your ministry or event.
And, to save a lot of headache, find out how to lock your device with parental controls or use guided access to make sure it is used the way you intend.
Have someone hold the iPad or use a mount. We drilled and attached this model for our iPad: Arkon Heavy Duty It securely holds it in place while being flexible to adjust for different heights and positions.
Photo Booth:
- Students pose for pictures.
All you have have to do is get a few people started, and a line will form with others wanting to get in on the fun.
- Photos are uploaded to the cloud.
Pocketbooth Party actually creates a cloud gallery. See below for a way to display this during your event.
- Each person gets one printed picture.
Have a leader available to print one picture per student. We gave students a paper wristband when they checked in to the event. We cut that off when they had a picture printed.
- Everyone gets a link to view, download and share all pictures.
Follow-up your event with a short highlight email, inviting students back to your weekly program or service. Include in the email the url link to view the photo gallery. Anyone with the link can download copies of the pictures to share through social media, save or print.
Options:
- Device with a Camera
You can start very simply by just using your own, but for a variety of reasons from security to the risk of damage, it would be worth the cost to invest in at least an iPod Touch or something similar.
- Photo Booth App
If you are very skeptical about this or want to save money, you could use the built in camera and photo album. However, for this to work the easiest, give you the most options, and work best at sharing with others, an app like Pocketbooth or Pocketbooth Party would be much better options.
- Printer
Yes, you can take pictures without a printer, but so can most students with their devices. Students take more pictures than ever but have less physical photos than ever too. Getting a printer such as an Epson XP620 has several advantages: print wirelessly from your device; prints photos well; has separate ink cartridges so you only replace the color you are out of instead of all of the cartridges.
- Props
Junior highers love taking pictures of themselves. But if you want to take the fun to the next level, fill a tub with random items you have around like funny glasses, hats, wigs, etc. Take advantage of sales after halloween to pick up props really cheap. You can even grab a background if you want from a local party store.
- LIVE Photo Gallery
If you have a way to display a web browser on a tv or projection screen, you can bring up the url for the Pocketbooth Party gallery and set it to display live during your event. As photos are taken, they will be added to the gallery and everyone can enjoy them immediately! This is a great option to set up where parents will be picking up or in a snack area where students will be hanging out.
- Hire someone
If all this sounds like too much work, ask around and find someone local who offers a photo booth service for parties. I will challenge you that the cost to bring someone like that out for one event could be equal to what it would cost you to purchase the equipment listed above. Hire someone and they do all the work. But the equipment and you can offer this whenever you want.
DOWNLOAD THE PDF VERSION OF THIS EVENT
If you liked this idea, check out another fun game for junior highers here:
Life-Sized Connect Four
 Mike is the Middle School Pastor at Mount Pleasant Christian Church in Greenwood, Indiana, where he oversees their ministries for 5th-8th graders. He’s been in full-time youth ministry over 15 years with most of that time focused on preteens and junior highers.
Photo by Kevin Harber and used under a Creative Commons License from https://flic.kr/p/62rv99